…and by recently, I mean a couple of years ago.
Body Blocks
I can’t exactly remember the circumstances at the time—though it was probably that I had gained a bit of weight post-COVID and was feeling frustrated with my ill-fitting clothes, and/or was watching a bunch of tailoring videos online because, given my size and shape, I’ve always hated how difficult it is for me to find clothes that fit me properly off the rack—but in August of 2023, I decided it was time to explore making my own clothes.
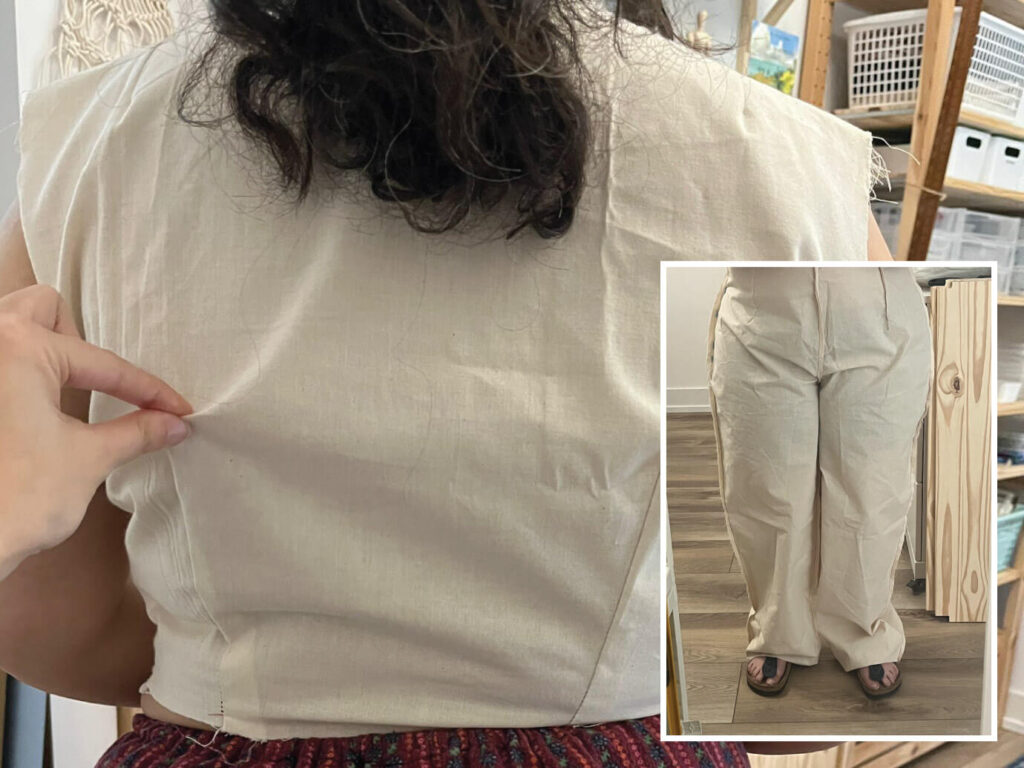
Encouraged by The Closet Historian’s drafting tutorials, I tried to make an upper body block so that I can sew clothing items following my own measurements. I followed the instructions provided in the videos and the drafting book I had, but the block didn’t come out perfectly (shocking, I know). After another revision, the process for which was frustratingly difficult, with lots of micro changes and adjustments needed, the fit was improved upon a bit, but I’d had enough of the project at that point, feeling disappointed and mentally exhausted, so I let it go. Still, I was happy that I challenged myself with making something completely new to me.
The following year, I gave the upper body block another try, but my patience didn’t last long and I abandoned the task as I had before. I wasn’t ready to give up entirely, however, so I decided to make a lower body/trouser block next. Which is even harder. Did I come up with something that I could put on? Yes. Did it actually fit me well? No. I once again decided that was that and, laughing and shaking my head at the expectations I put on myself, I moved on.
I’m not sure when I’ll have the mental or emotional capacity to revisit this idea, but I do know that Bianca (The Closet Historian), whose videos I love, has recently created a new series, Drafting Dangerous, for drafting one’s own body block patterns, so when or if I do try to tackle this on my own again, I’ll give those tutorial videos a try.
Pikmin
Around the time of my first upper body block attempt, my mother shared with me that my then 7-year-old nephew had been wanting a yellow Pikmin doll and she asked if I could look into making one. After the distressing challenges I experienced with the block pattern, I was all too happy to have something smaller and more fun to work on.
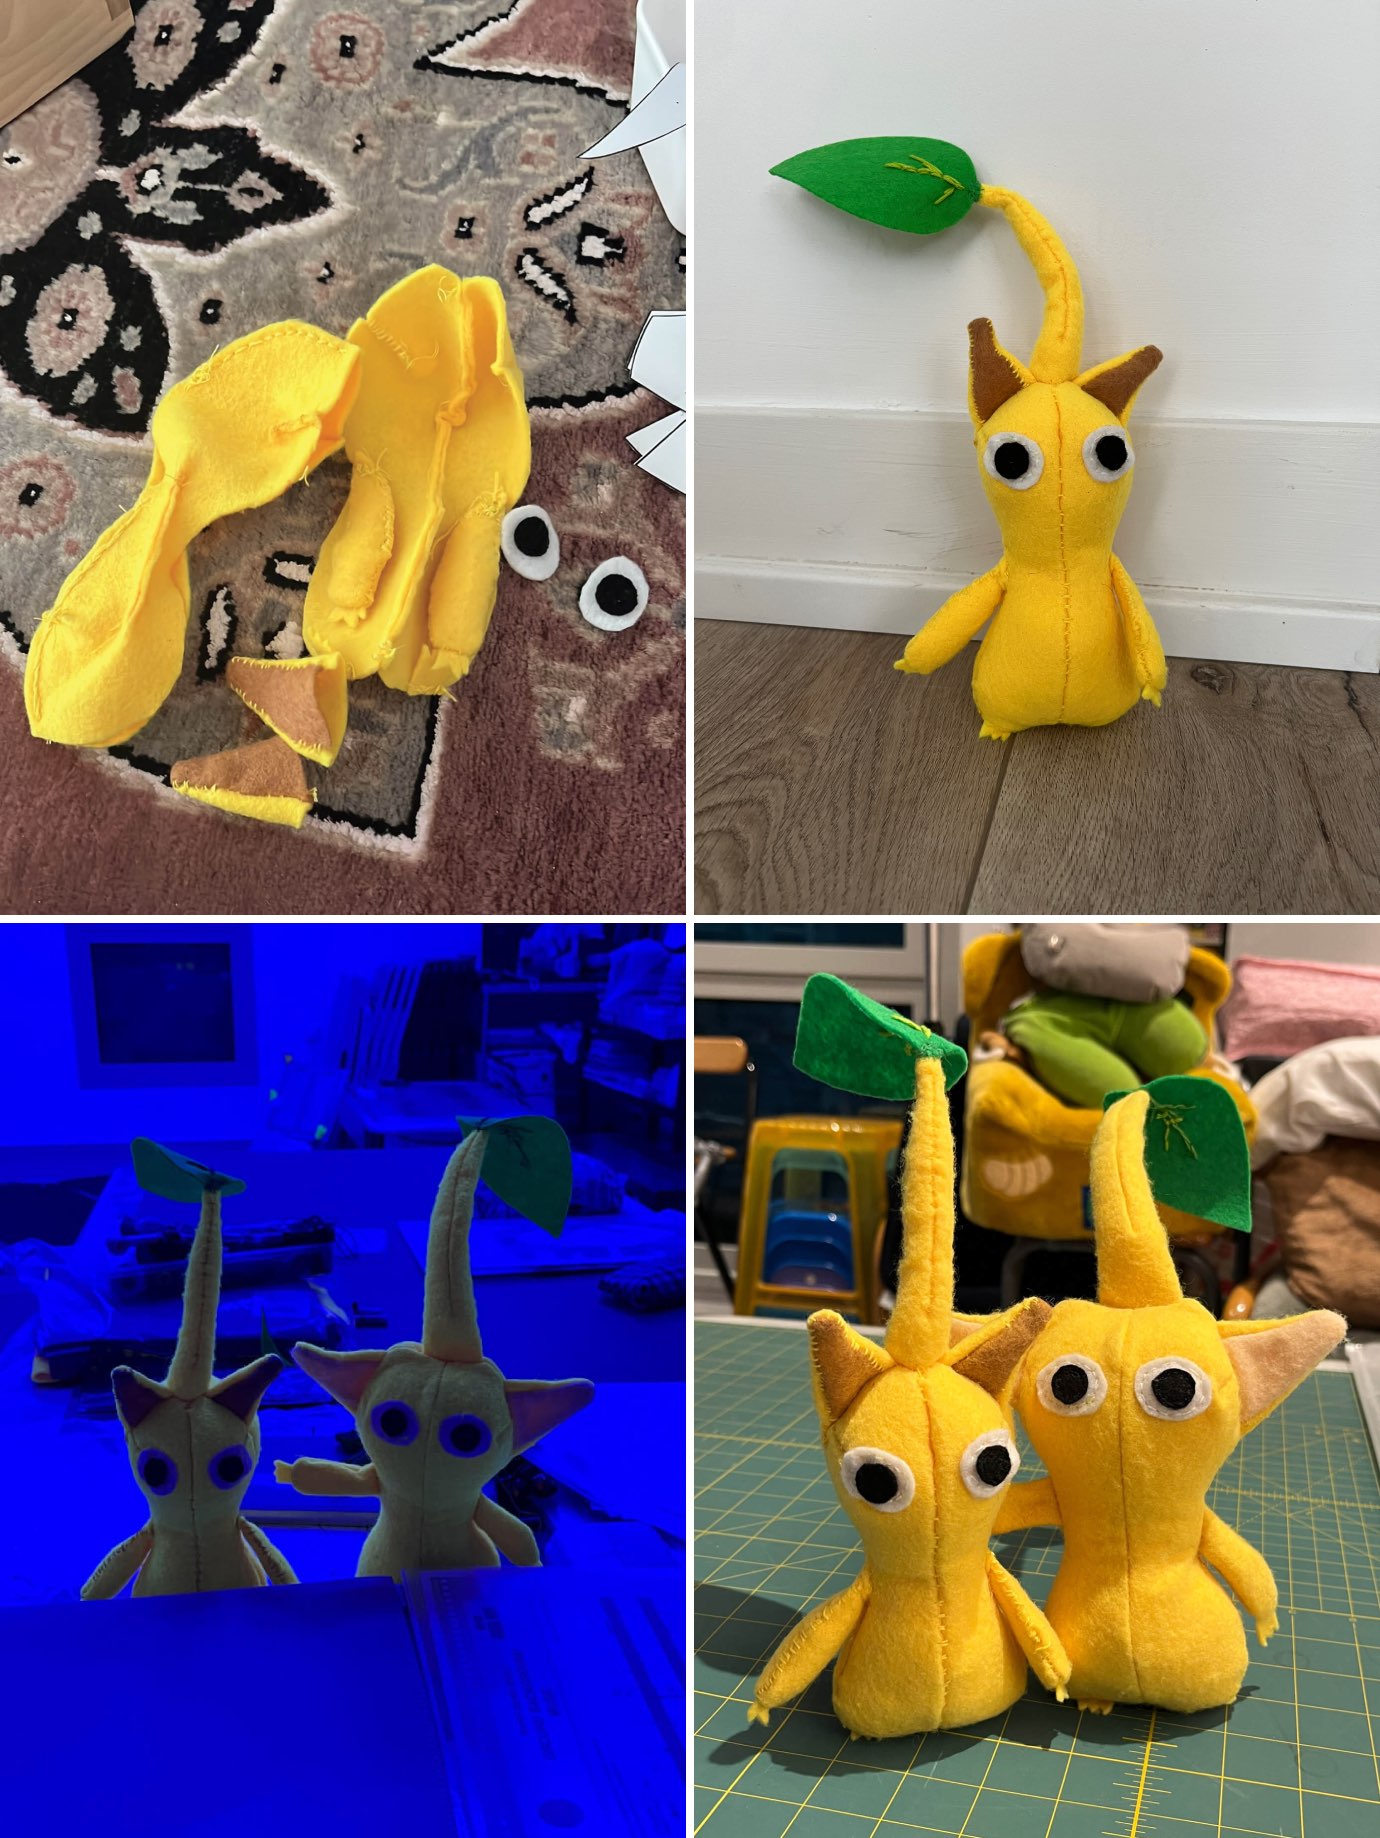
I’d never heard of Pikmin, but I looked them up and found a Youtube tutorial that included a free easy-to-download pattern, and seemed approachable for someone like me, who at that point hadn’t sewn anything by hand before save for minimal repairs such as the reattachment of buttons and the like. I purchased some felt from a craft store and gave it a go.
It came out looking a little rough. My stitching was clumsy and unrefined, perhaps mostly because I wanted to make it quickly and see how it would all be coming together. Still, it was cute.
I then made it again with some minor adjustments to the pattern to see if making a slightly larger version, that I could put together using a sewing machine, would be easier and result in something more “polished”. Unfortunately, the proportions didn’t work. While Pikmin #2 was more securely sewn, he was also very square-shaped, albeit charmingly so, and held little resemblance to an actual Pikmin.
Thankfully, though I very much adore these little fellas, my future creations benefited from an improvement in my skills (but perhaps not by much)!
August and September 2023.
Bulbmin
My nephew, now realizing that if he asks for something there’s a high likelihood that his aunt will make it for him, and not understanding how ambitious this next project would be for me to undertake, then asked for a Bulbmin…yet another creature I’d never heard of.
All I could find was this adorably and roughly sketched partial pattern of a Bulborb (similar to the Bulbmin) by cosmicArtist on Tumblr, which provided me with a much appreciated starting point.
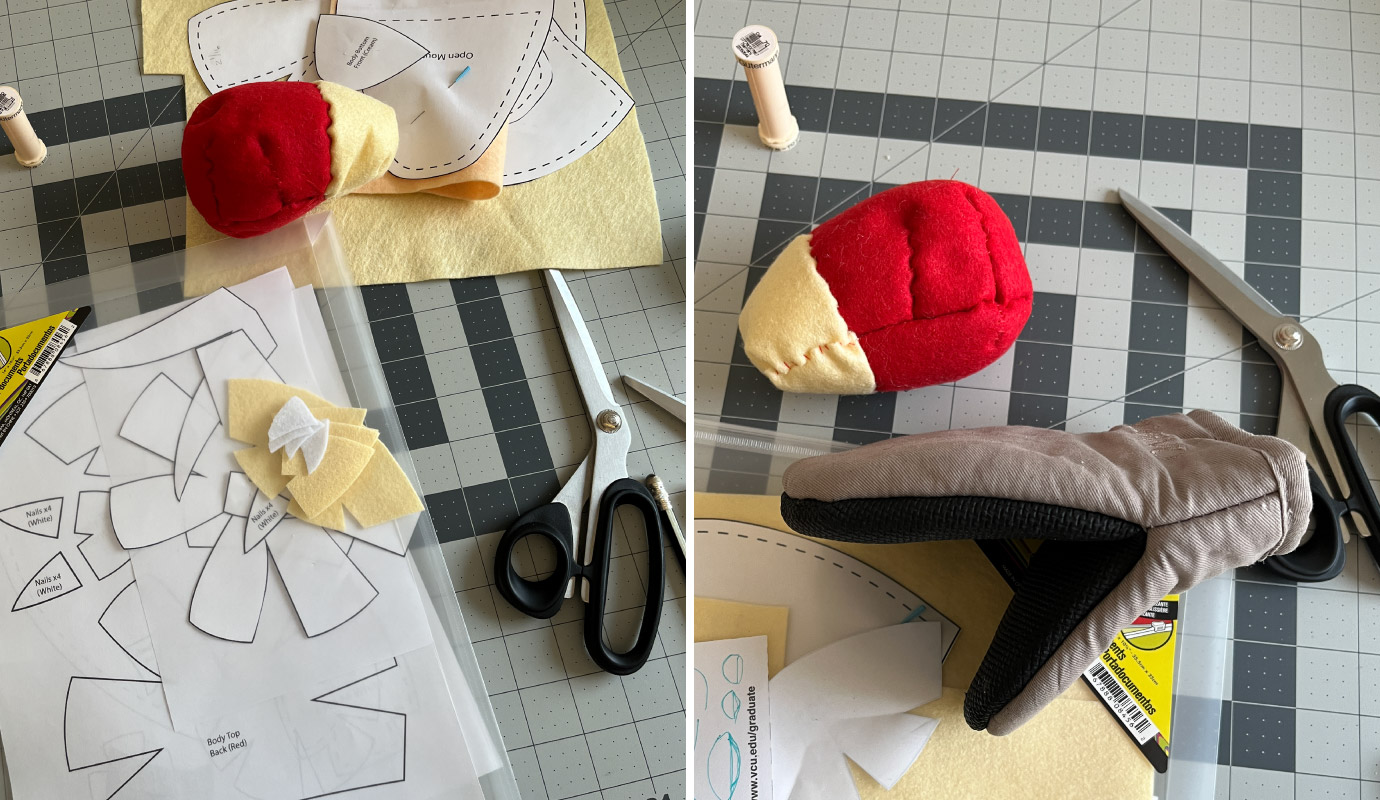
My brain struggles with three-dimensional visualizations, so I digitized the pattern and experimented with adjustments and additional parts. I also really wanted to see if I could make the Bulbmin’s mouth open…and studied the construction of an oven mitt I had to try to achieve that result.
I flew to visit my family during these experimentations and soon afterwards found myself on a deadline to complete the Bulbmin (to give to my nephew before my return home), so I had to work quickly and pretty much winged the whole thing from there.

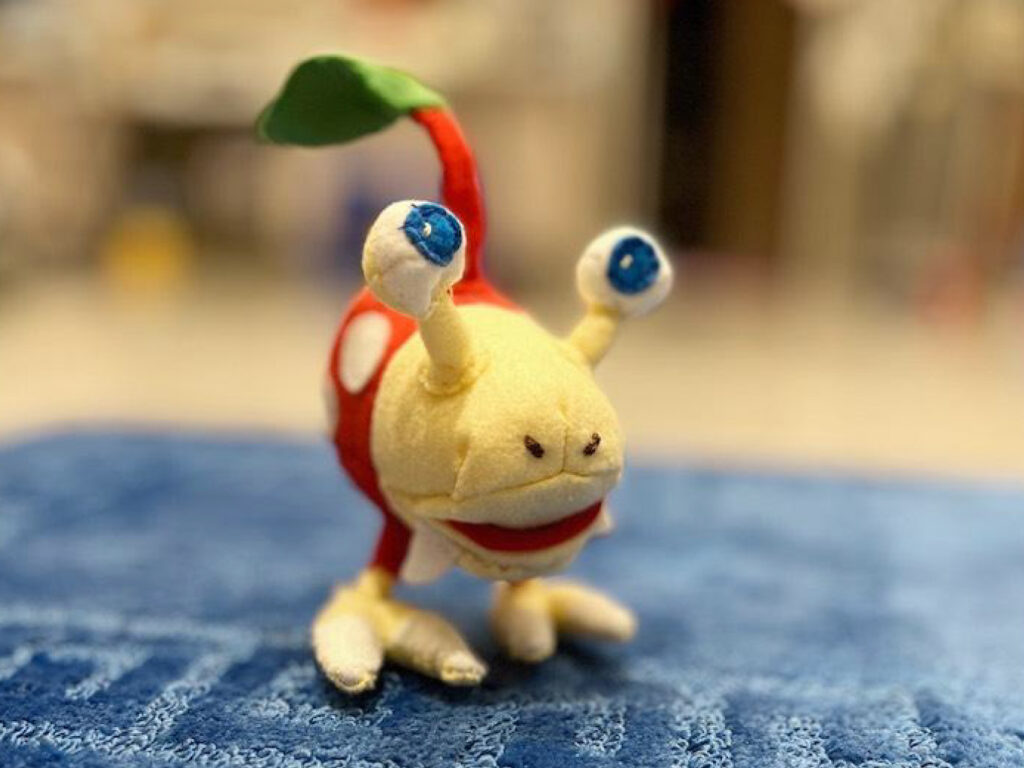
When all was said and done and I tried to re-trace my steps, I couldn’t remember the choices and changes I made along the way. I do hope to someday re-visit this project to create a clear pattern and better process documentation to share freely with others.
Until then, here’s a photo of my Bulbmin, poorly-taken the night before gifting to my nephew and boarding my flight home.
Red
While I was working on the Bulbmin, I was entreated for one more creation: Red from Angry Birds. Thankfully, this request was easier to satisfy than the one made previously.
Again, I managed to find a pattern online (Obsessively Stitching) that seemed easy enough to tackle with felt and some hand-sewing.
The beak wasn’t great (I really must get better at attaching appendages…don’t look too closely at Bulbmin’s eyes), but he came together nicely enough!
Kirby
Once back home again in the new year, and feeling eager for a different kind of challenge (working with new materials and putting my sewing machine to use), I made a Kirby plushie, also for my nephew, using Choly Knight’s excellent free Kirby Plush pattern! The pattern instructions were super clear and organized. I used felt appliqués instead of embroidering the facial features.
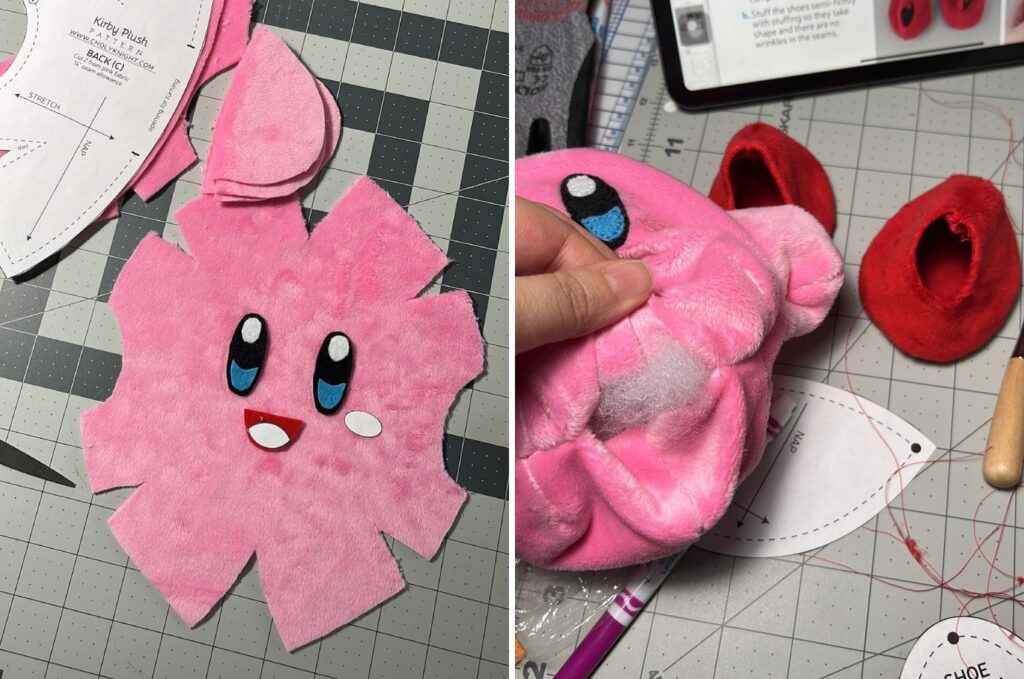
It was my first time working with minky fabric…that was quite an adventure. I had read warnings and horror stories online about how messy working with minky can be, and that did give me pause at first, but honestly, it wasn’t as bad as I anticipated. Yes, there was fuzz everywhere, but not in the amounts I had read about. It might be more challenging or frustrating for smaller projects with smaller pattern pieces to work with, but for this Kirby, things were manageable. Whatever imperfections I ended up with were more so due to being unfamiliar with needing to stretch the fabric while sewing around curves and keeping a steady hand under the sewing machine, rather than the nature of the fabric itself.
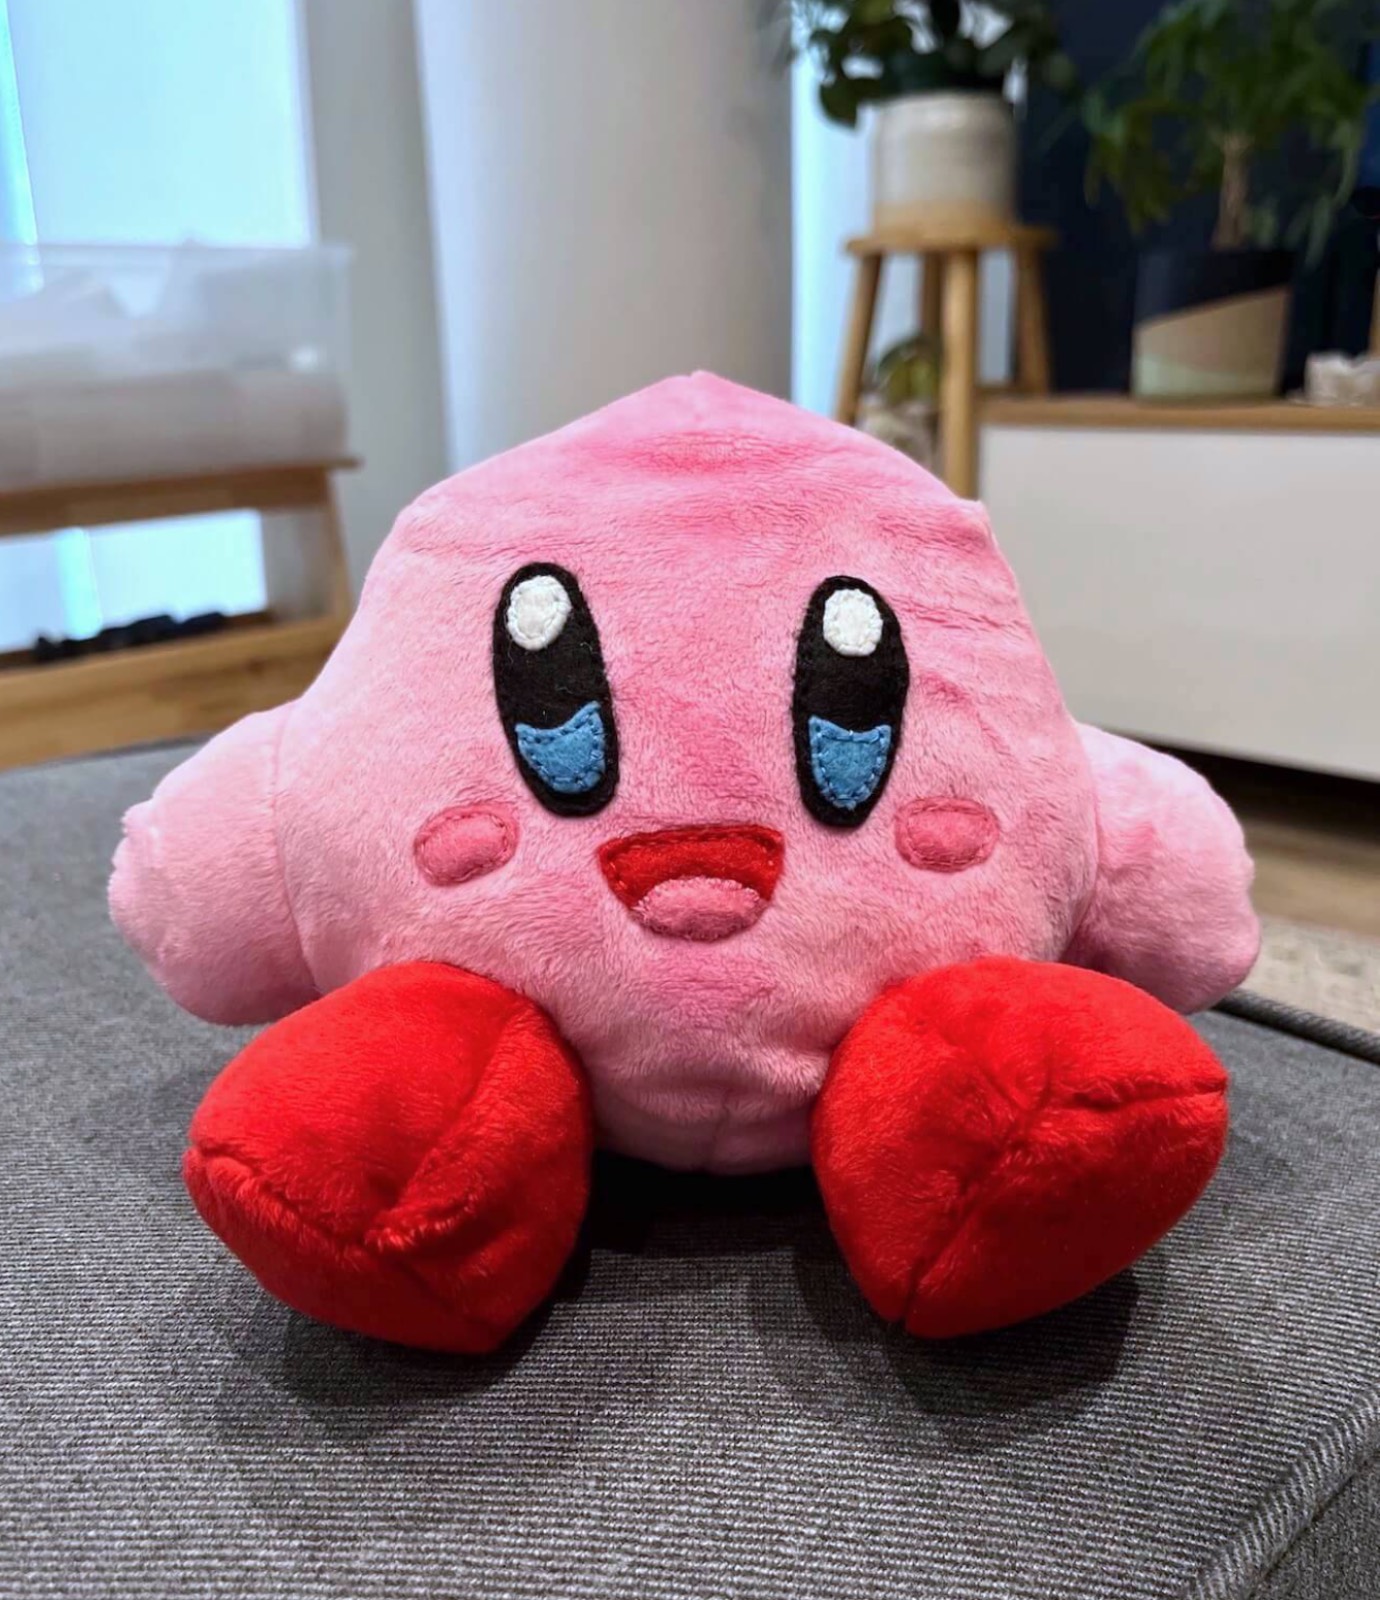
He turned out to be the softest, most adorable thing!
Pin Cushion
With my nephew’s projects accomplished, I turned to making things for myself. It was around this time that I started working on my Indigo-inspired desk mat, though that wouldn’t be completed until the following year.
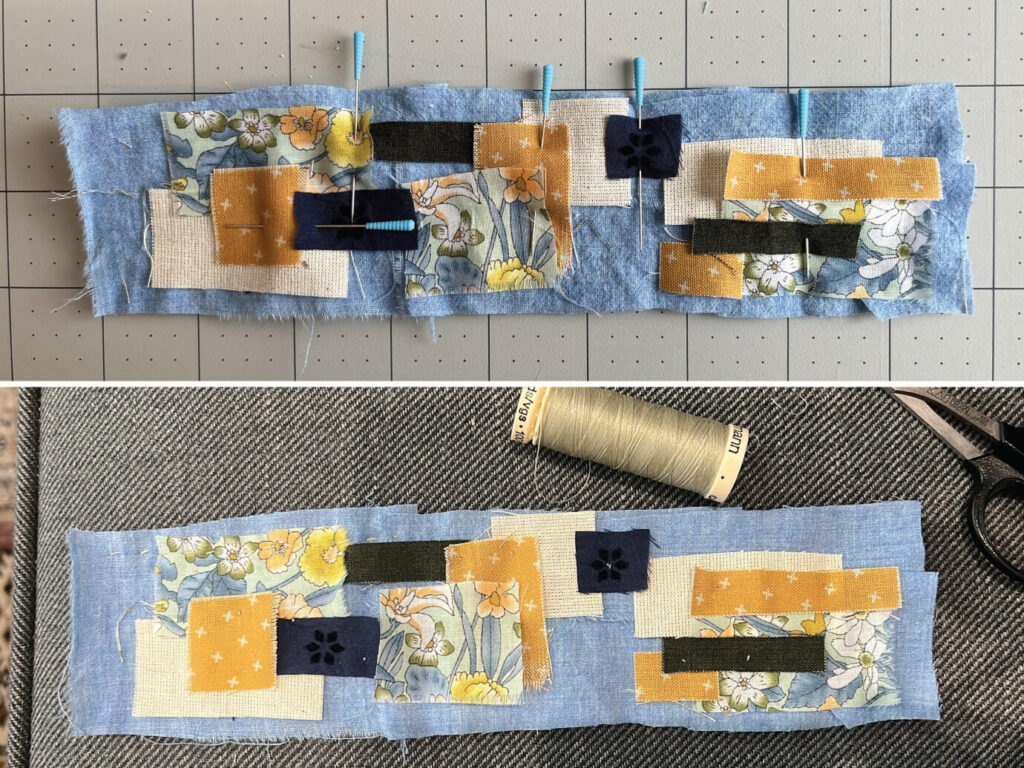
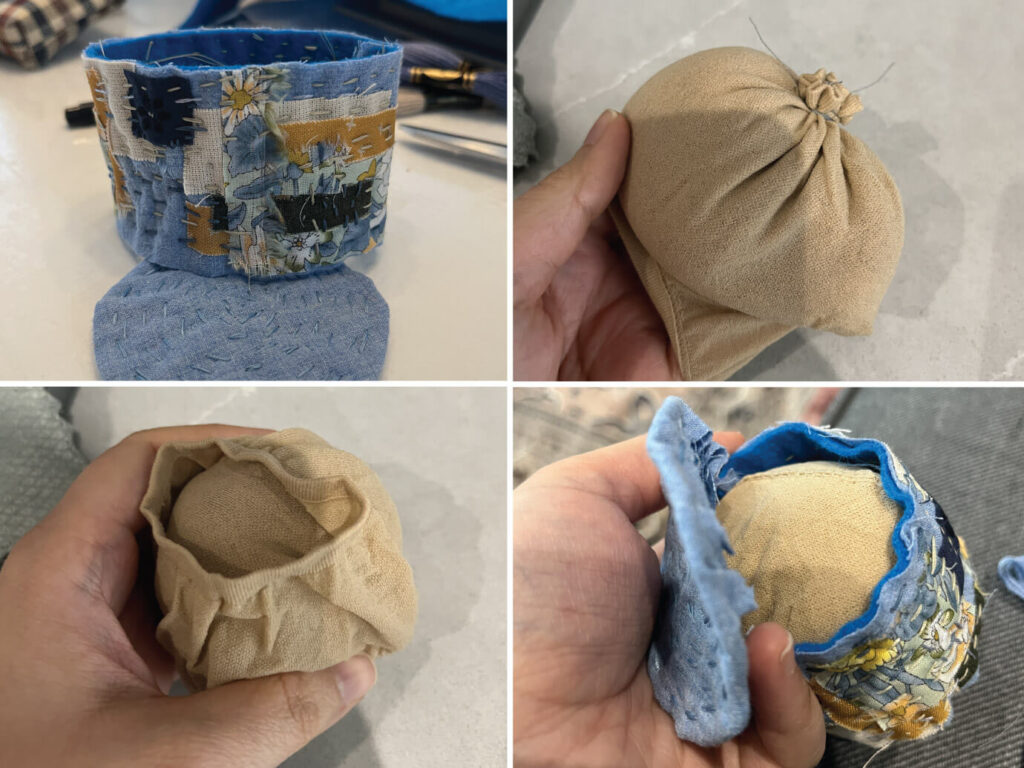
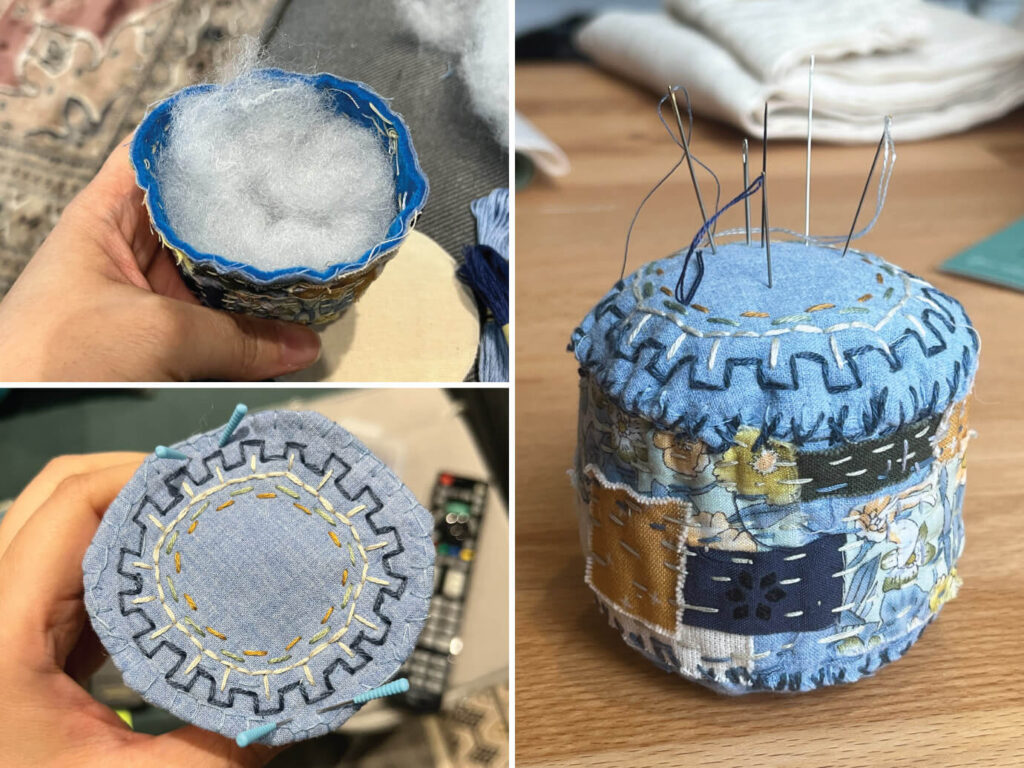
I also made a little pin cushion (that I still use, mainly as a needle holder) following a video tutorial by Jo Mo. I was searching for small hand-made projects that could get me started with slow stitching and this fit the bill perfectly.
I used blue polyester felt for the backing and a pair of foot cover nylons for the crushed walnut filling (which I had a hard time finding at my neighbourhood pet stores and had to eventually order online). I played around with some fabrics I had then jumped into the creative stitching from there, prioritizing enjoying the process over perfecting my stitches. The last photo is of the needle cushion today, almost two years later, well-used and always by my side whenever I’m hand sewing, so I’d say it’s held up great!
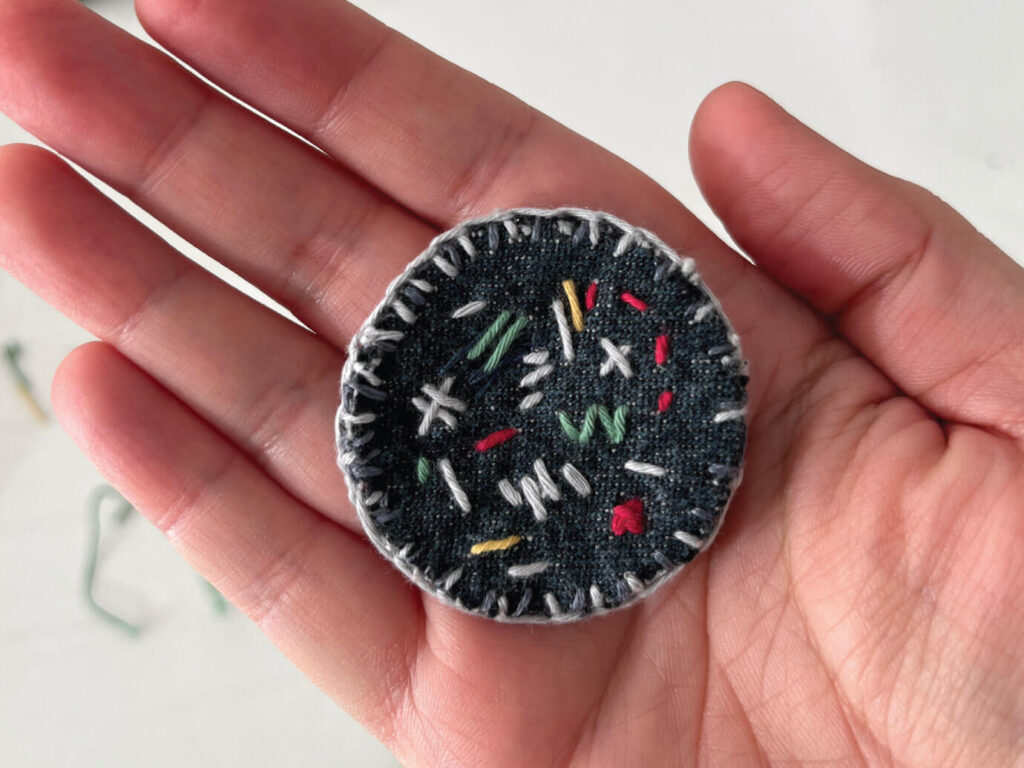
Palm Thimble
A couple of months after that I made a little sashiko palm thimble based on Xiaoxiao Yarn’s tutorial. Though I have yet to do any actual sashiko-ing, as nothing I’ve worked on has required the needlework technique and uniform stitch patterns that are characteristic of sashiko, I have used it on occasion to push a needle through particularly thick layers or difficult spots…and I so very much love how it looks!
I do have some other projects from the past few years that I’ve been wanting to write about and share, but they do not fall under the category of sewing/needlecraft, so I’ll expand on them separately, but given my pattern of posting about things months or years after working on them, it remains to be seen when they’ll be up on the blog!