Continuing our annual tradition of making something during the holidays to add to our Christmas tree, my sister and I turned to air-dry clay this time.
I’d never worked with air-dry clay before (or any other type, for that matter), so this craft project had its challenges and was a learning experience to be sure…but it was an enjoyable one nonetheless.
And in keeping with the idea of making ornaments that have personal meaning, my creations were book-related (shocker!), and my sister’s was inspired by a popular video game.
I chose to make two simple ornaments: a stack of books, and the Penguin logo! The former, to commemorate starting my “classics-reading journey” in 2025, and the latter…well, that was for my months-long obsession with growing my collection of the original black spine Penguin Classics.
Based on some Pinterest images and a couple of Youtube videos, making the books seemed easy enough. I don’t generally buy or read hardcovers, but when one thinks “classics”, these are the kinds of books one may imagine.
I learned that I shouldn’t have stacked them before they were fully dry, as the weight of each book tended to collapse the one beneath it slightly as they were air drying. I find the slim brown book in the middle quite comical at how squished it is! Haha. But you make and you learn and it’s still cute.
The painting process was fun but frustrating at times as I struggled to achieve the colours I wanted, which to be honest, I didn’t have a clear idea about when I began painting…still, in the end, it all came together to an acceptable degree and I am very happy with the ornament…and I love the beaded hanger!
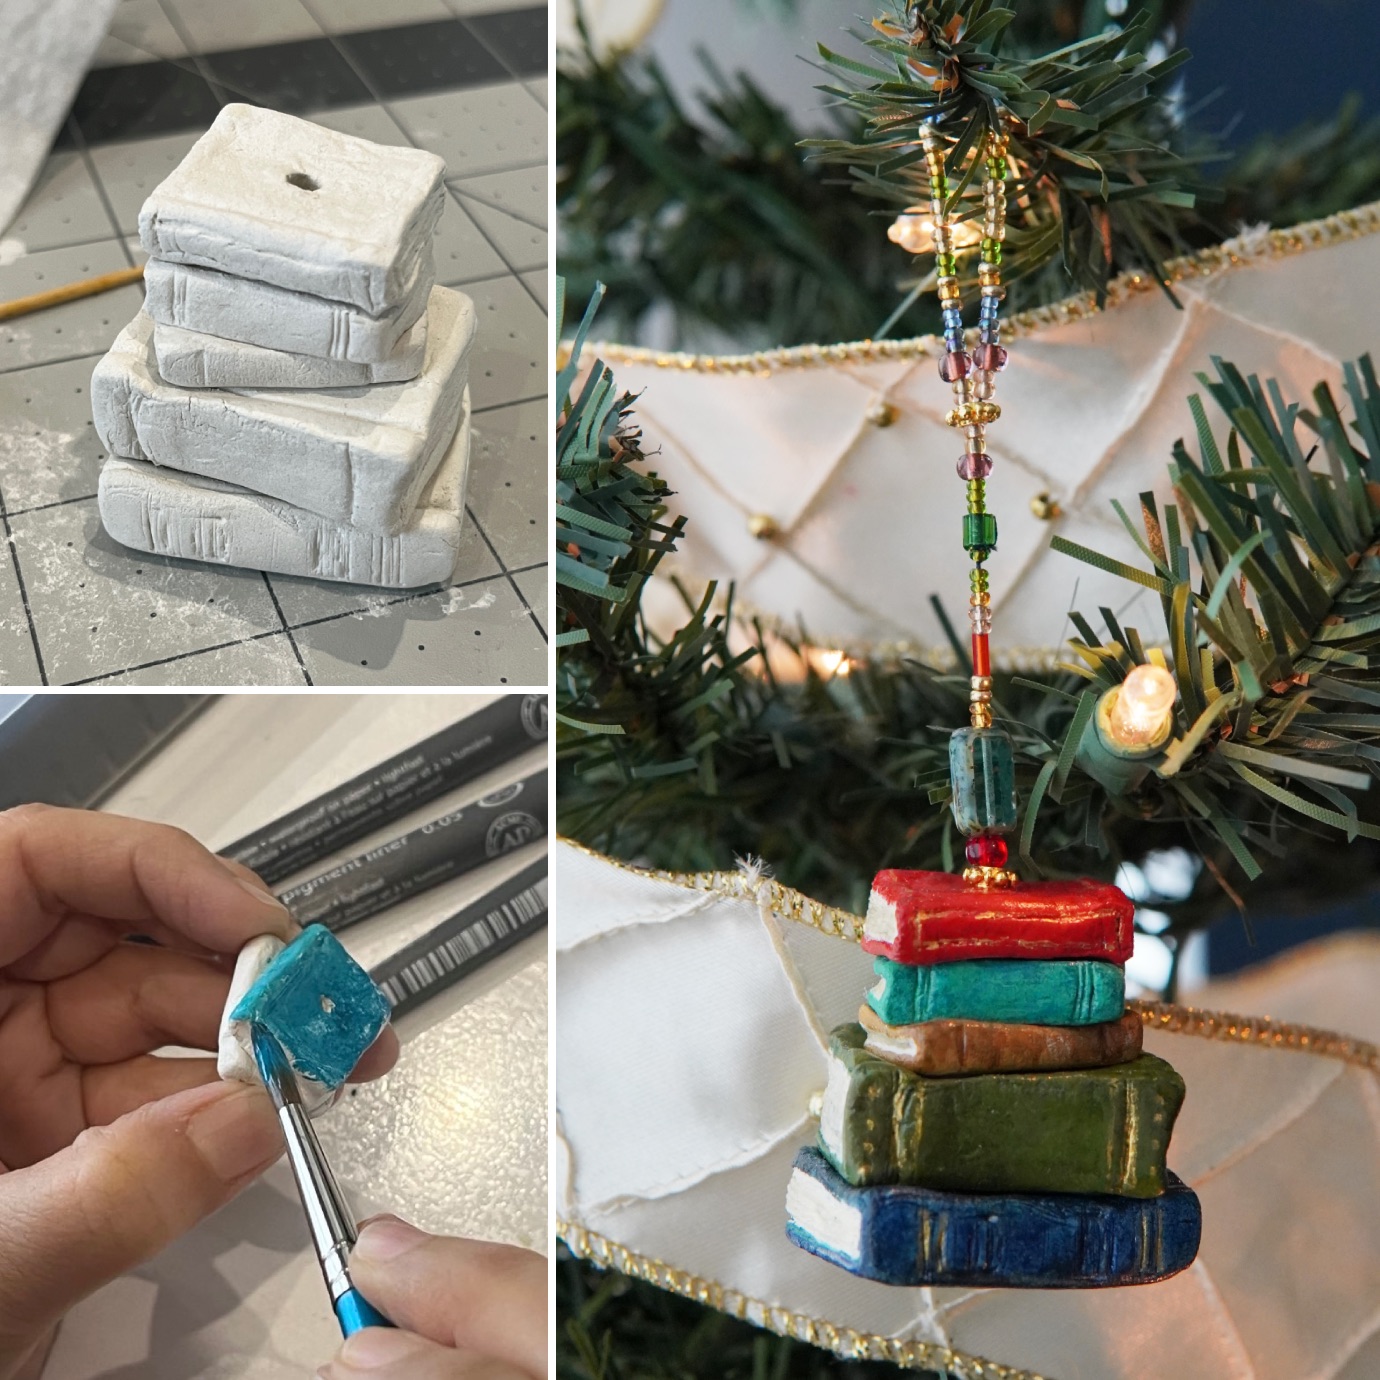
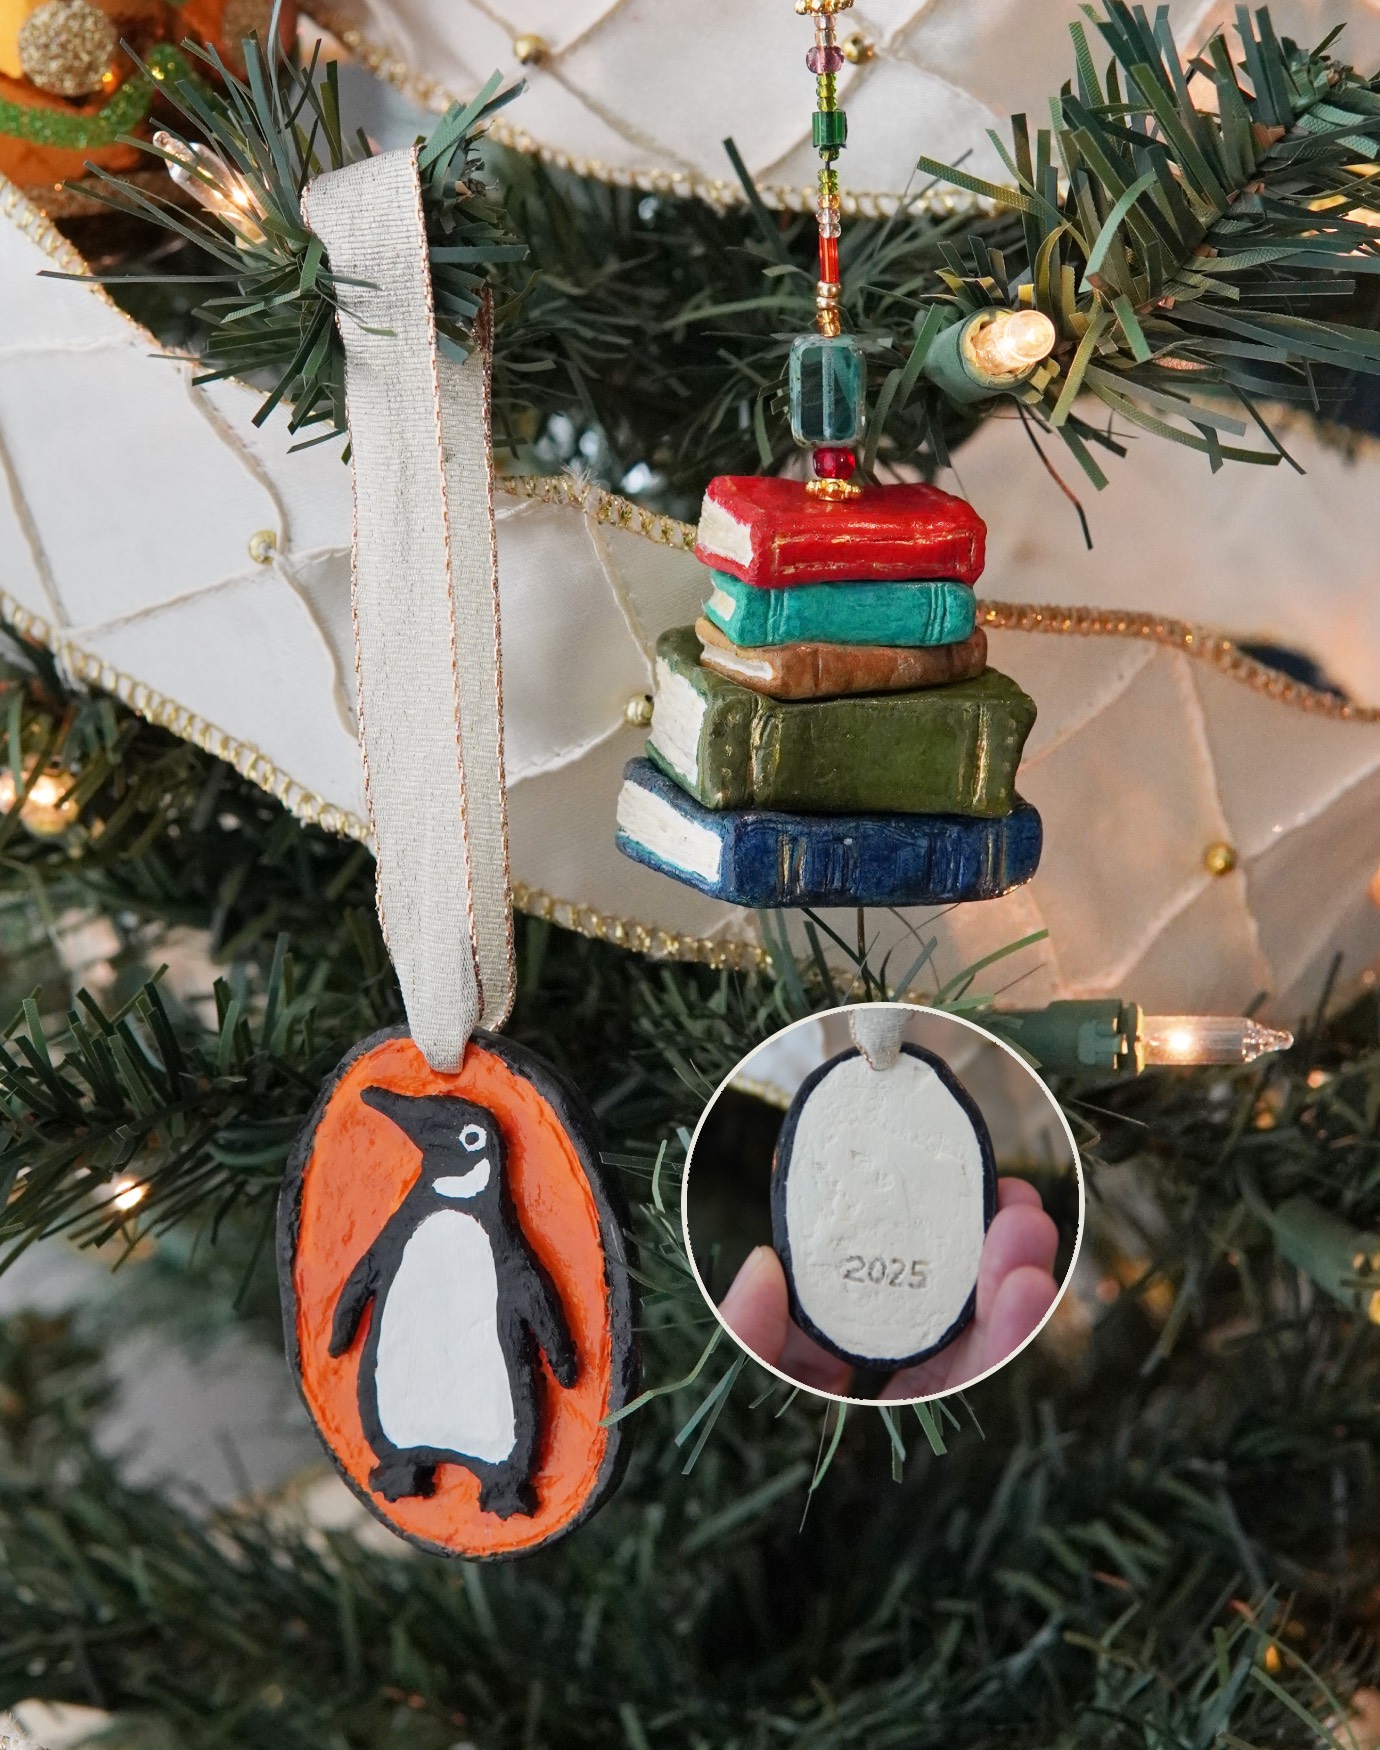
Right: Painted, beaded, and hanging on the tree.
The Penguin logo was a bit more challenging to create. I first printed and cut out the logo to use as a template. Then I cut two parts out of the clay: the oval background, and the penguin. I couldn’t lift and lay the penguin on top of the oval without unintentionally deforming or stretching it a bit, so I then had to do a whole lot of coaxing and shaping to get the penguin’s wings and feet to look decent enough. My sister helped me with the feet as she’s far better at this sort of thing. Before the background was fully dry, I flipped the ornament over and roughly inscribed the year on the back using a toothpick. I had neglected to do something similar to the stack of books.

Bottom: Shaping the penguin’s feet and adding final details.
Once dry, it was time to paint! Though I only had one colour to deal with, this wasn’t as straightforward a process as I had hoped. Getting the right shade of orange was one thing, but I kept running out of it and had to mix a new batch several times, none of which matched the previous attempts, but I eventually chose to see this as “creating dimension”. And when it came to painting the black outlines, I kept getting black paint on some of the orange part…a pain to cover up. I was also really nervous about painting in the actual penguin, because black is hard to fix or cover with white if mistakes are made. But in the end, it turned out really well. It didn’t have to look perfect, just recognizable, and I think I was successful in this!
And just as with the stacked books, the lesson learnt here was that I should have shaped and let dry the two layers of the penguin ornament separately. This would have made it easier to paint each layer without worrying about paint transfers, and I could have then glued them together when I was done.
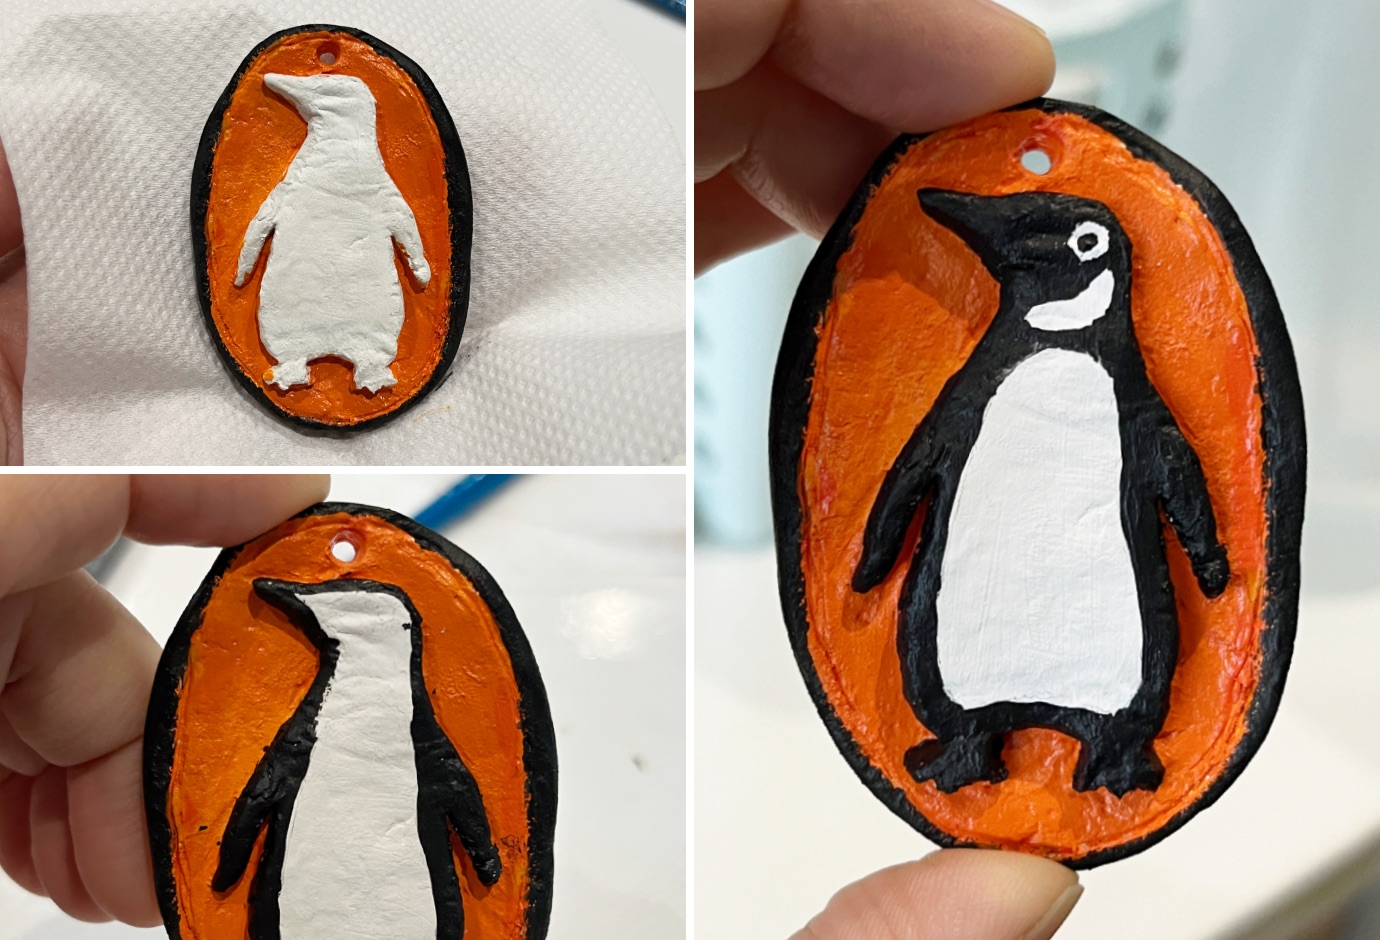
Right: The penguin’s eye and neck are added.
I painted the back of the ornament a light cream that makes me think of the paper colour of Penguin Classics. When the painting was done, I applied some semi-gloss mod podge to act as a sealer (it was all that I had)…but I only covered the oval part and didn’t apply any on the penguin because I wanted him to stand out a bit and not be glossy.
Instead of a beaded hanger, I searched through my stash of sewing odds and ends and found an ivory ribbon with gold edging that seemed to perfectly suit the ornament and added a bit of sophistication.
My sister’s amazing ornament is inspired by “Dark Bramble”, one of several planets, each with its own unique features, found in a computer game she had recently played and loved called Outer Wilds. This particular planet had imploded and been infected by some kind of space-bending plant growth, resulting in a broken frozen surface and a twisted wood core, whose centre is full of a gaseous fog and in which hostile anglerfish roam—represented here by the cute and not-hostile-looking little fish dangling at the bottom. In the game, the icy surface is a translucent dull green, not a vibrant blue…but she wasn’t going for an exact replica…and blue is her favourite colour.
I love how she brought the ornament to life! First she drew out her concept on her iPad and planned her steps. She then taped down some saran wrap, onto which she drew her design to better be able to follow the planet’s contours when building. She proceeded to creating the mangled wood by twisting wires and covering them with clay. The saran wrap had the added benefit of making removing the clay piece easier later when it was dry. I didn’t really catch how she built up the rest of the ornament, or how she made the centre part, as I was busy making my own pieces.
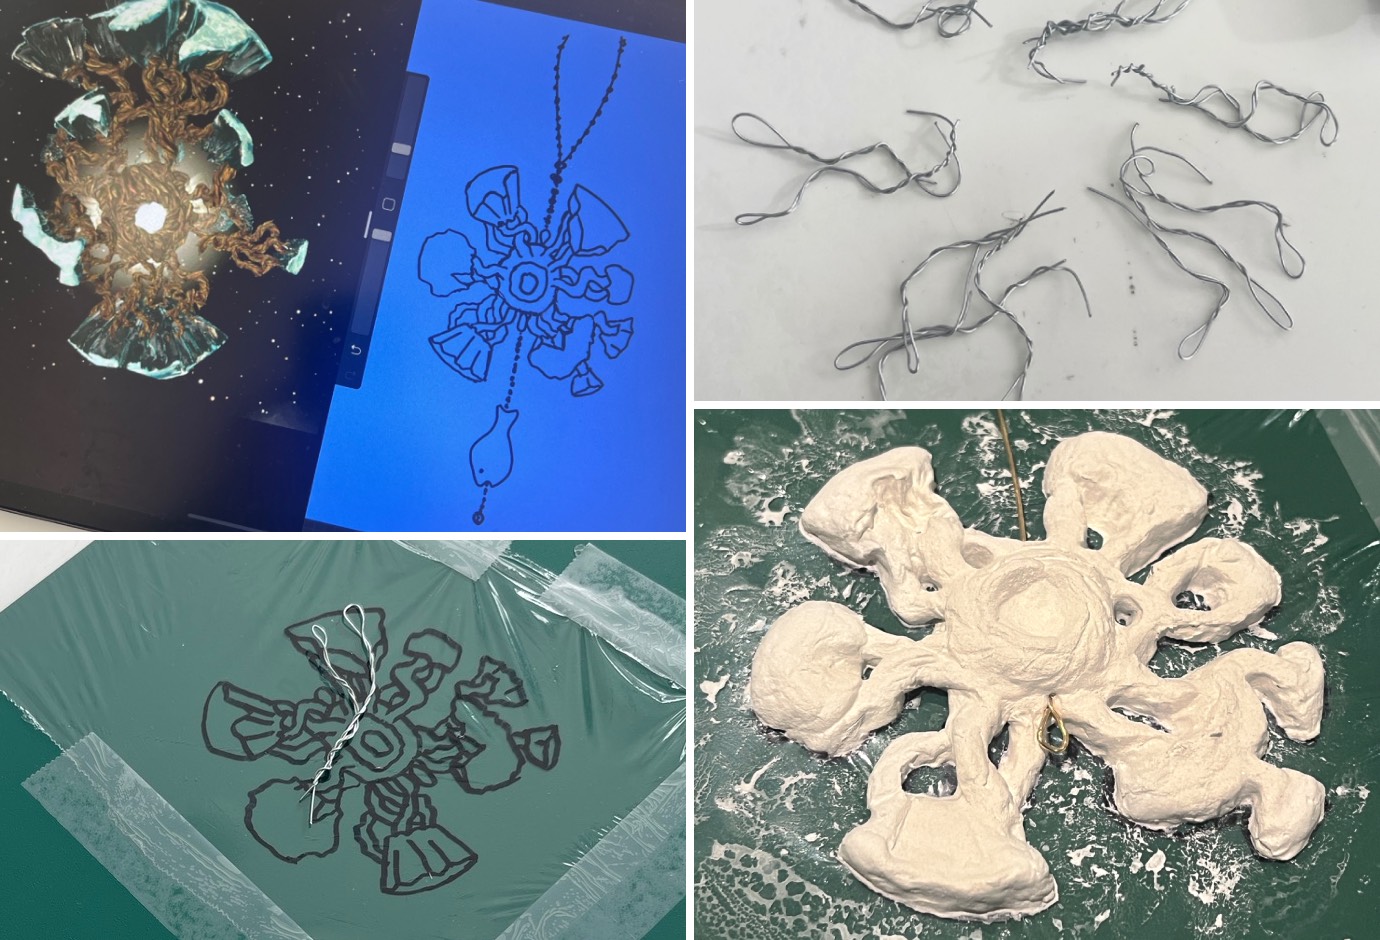
Bottom: Design transferred to saran wrap, and the ornament before painting.
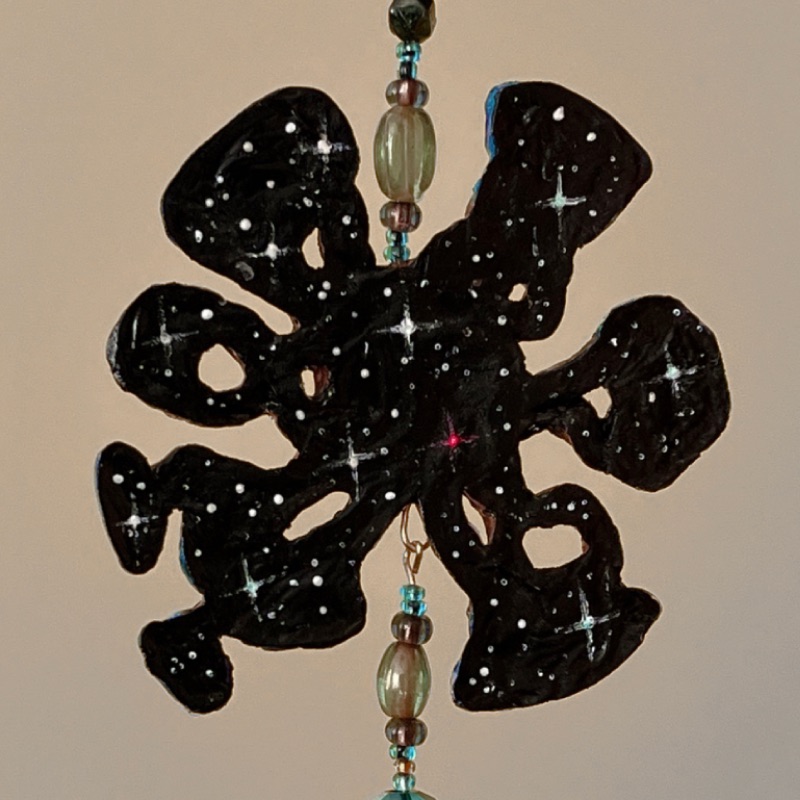
My sister then spent quite a bit of time on the painting to get the right colours and illustrate depth and dimension in the wood and icy surface. She painted a starry scene on the back since the game is set in outer space…I’m pretty sure it was me who suggested that idea when I heard her wondering out loud how to treat the flat reverse side.
She needed some specific supplies to complete the ornament that we didn’t have with us, so she finished the main section when we were together, but waited until she went home after the holidays to do some paint touch-ups and complete/perfect the beaded sections.
I think it turned out beautifully!
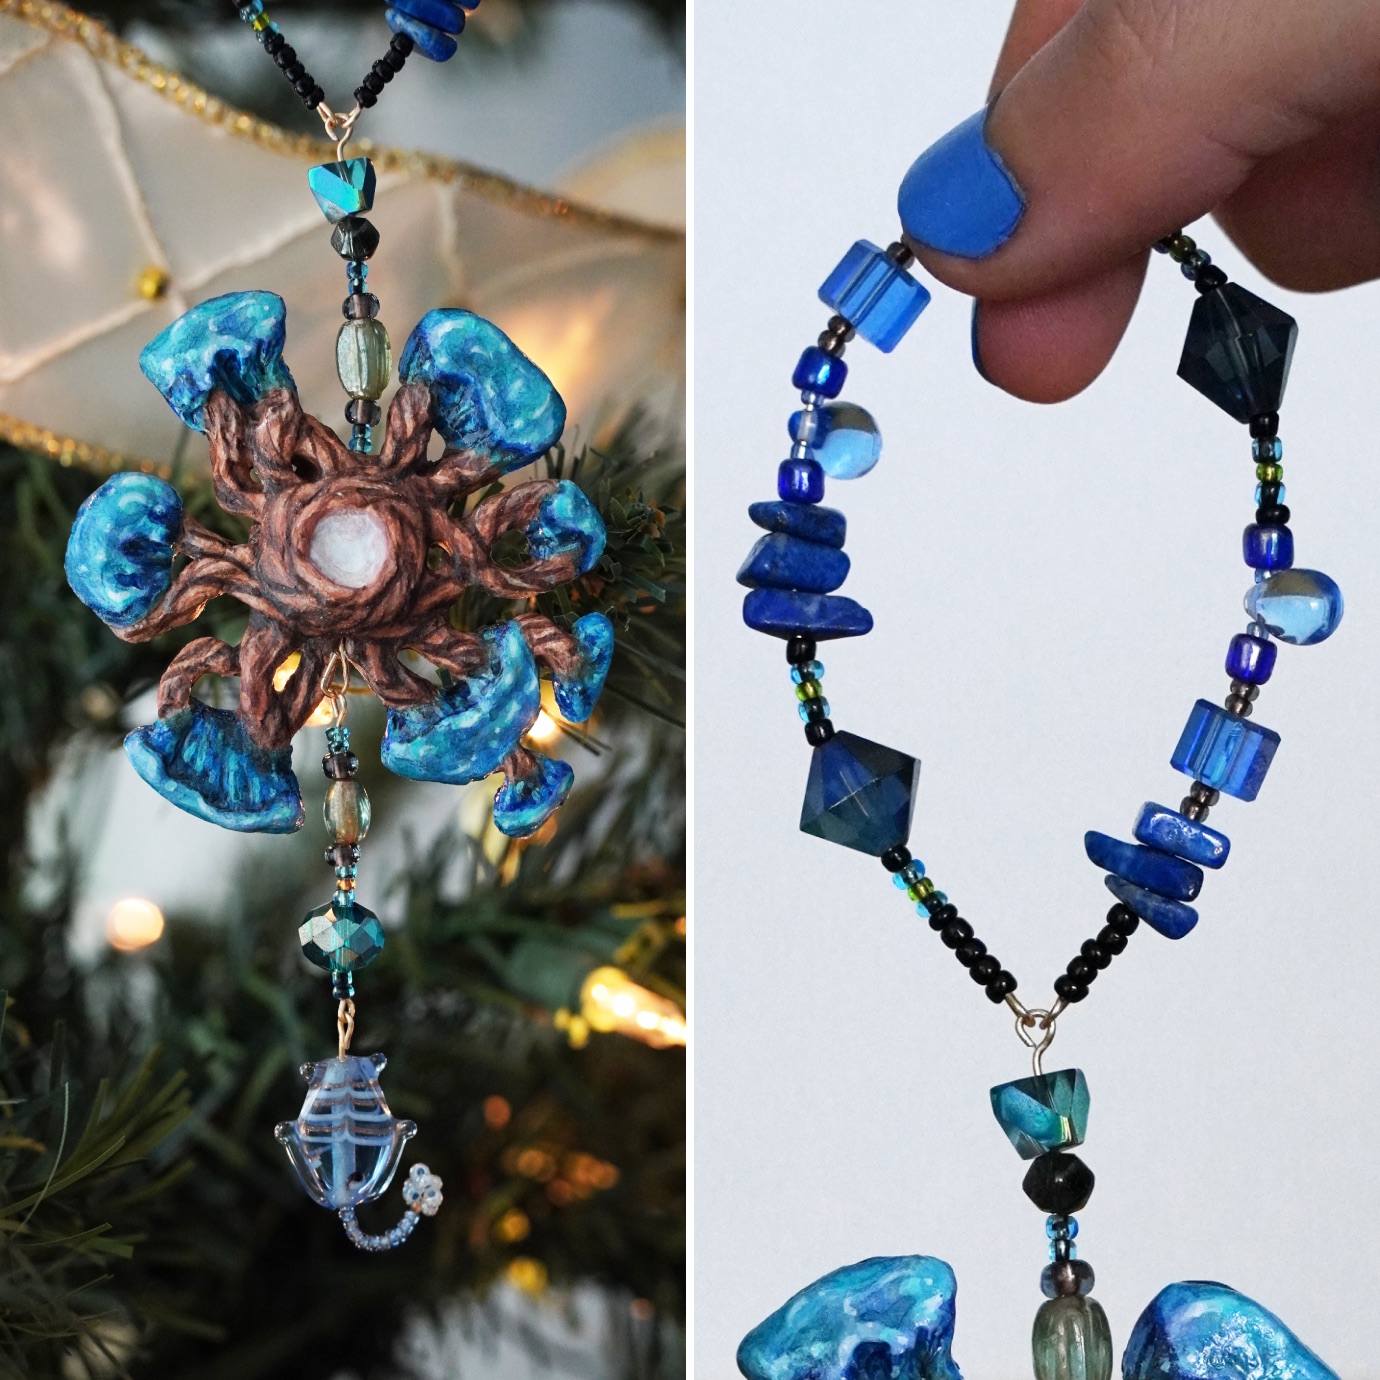
Right: Beaded hanger (feat. my sister’s hand).
I could not love this more! Especially the book stack 🙂
Thank you!